
MasterBitExpress Wallet is an application for sending and receiving Bitcoins. You own Your inherent data, count with privacy and decide where Your wallet is going to be backed up. Using Blockchain technology, transactions are automatically signed from within the wallet once required, transparently to the user, so that a seamless, privacy oriented and secure, experience of paying and receiving funds, is the main objective of MasterBitExpress.
Get It OnContact us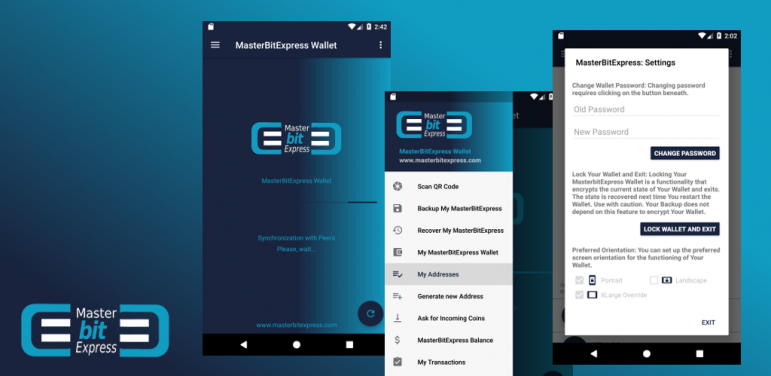
Managing Bitcoins with MasterBitExpress Bitcoin Wallet
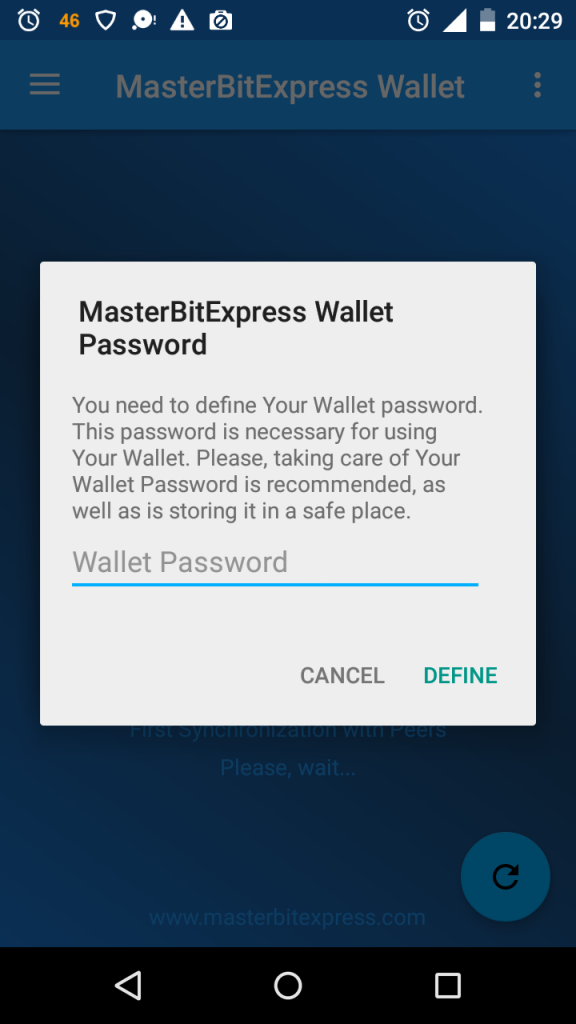
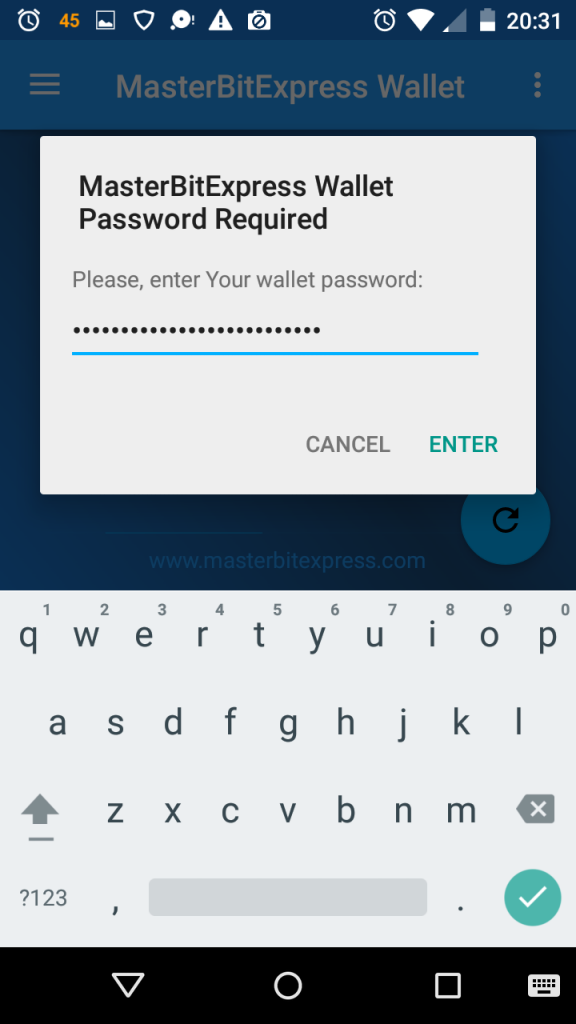
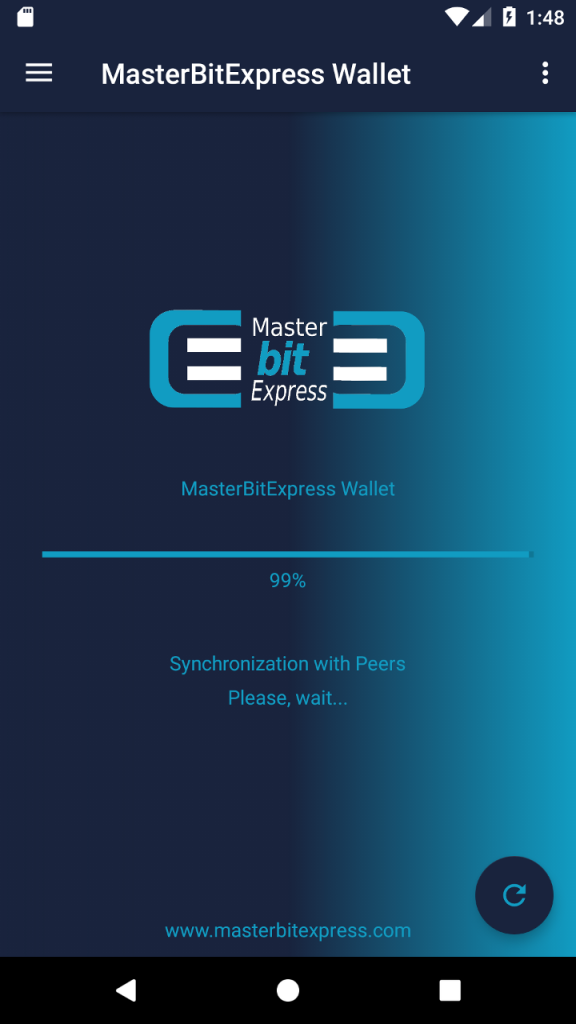
Being a Bitcoin (BTC) wallet, MasterBitExpress Bitcoin Wallet has the primary duty of managing the keys related to the process of sending and receiving BTCs as a mechanism inherently connected to the Blockchain ledger. For managing its Bitcoins, the wallet starts by connecting to the Peers Network for Synchronization, but the User must either firstly define his/her Wallet password or provide his/her valid one prior to the Synchronization:
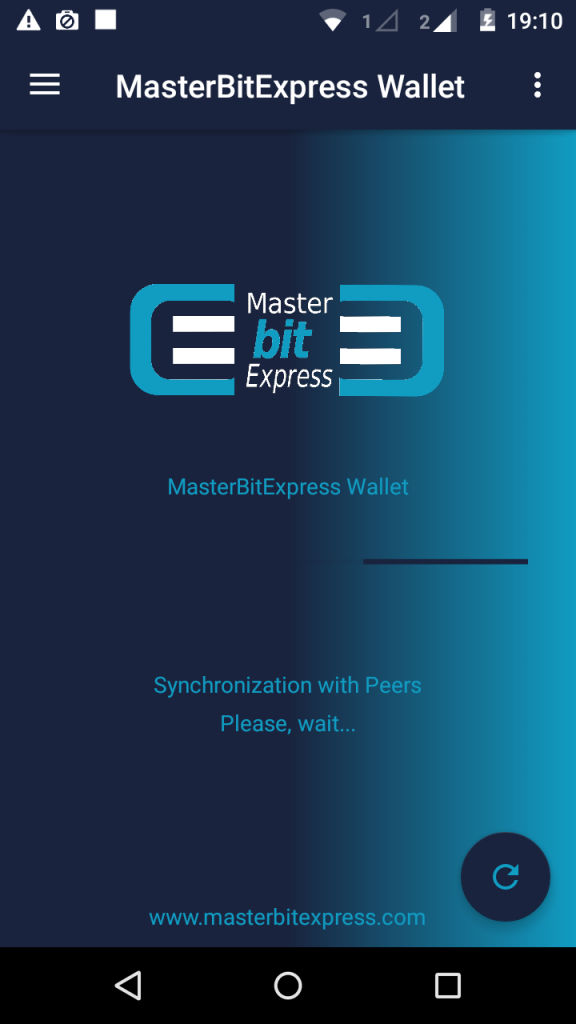
First time the synchronization occurs, a list of Peers is obtained from the Bitcoin infrastructure, so the first synchronization takes a little longer, usually within few minutes. Once the initial synchronization becomes complete, the main MasterBitExpress screen is shown.
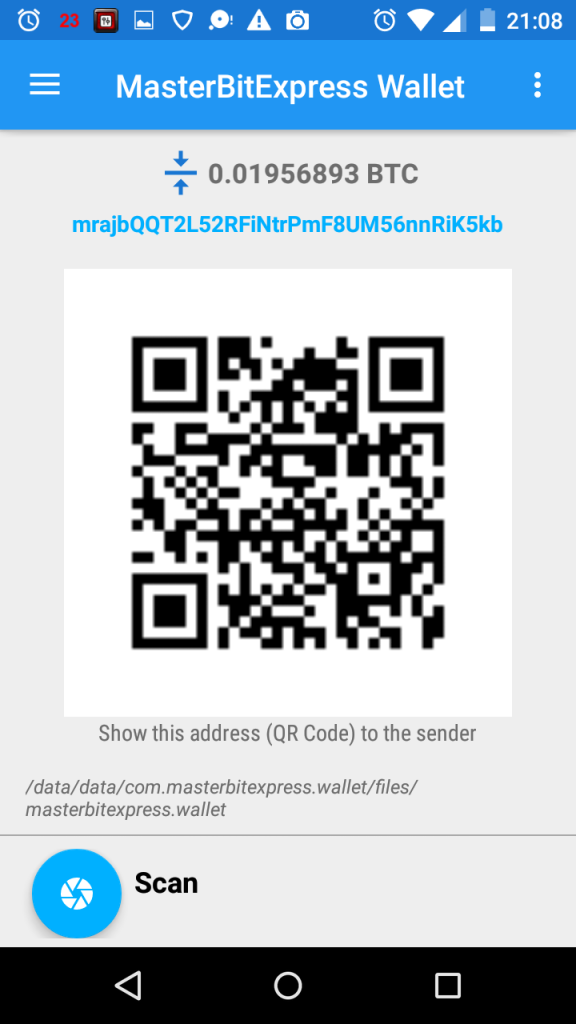
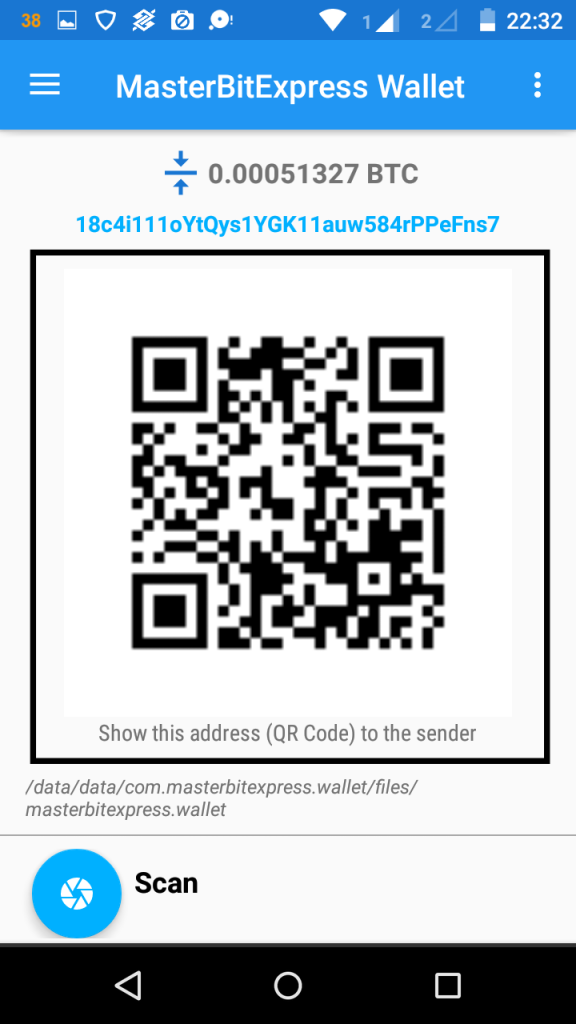
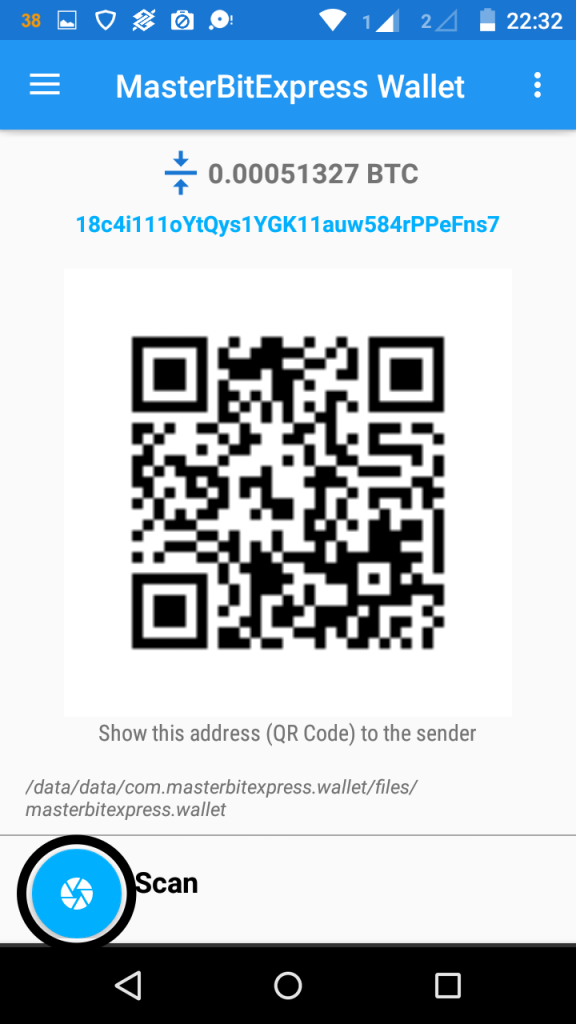
The latter screenshot shows 6 important areas of the main screen:
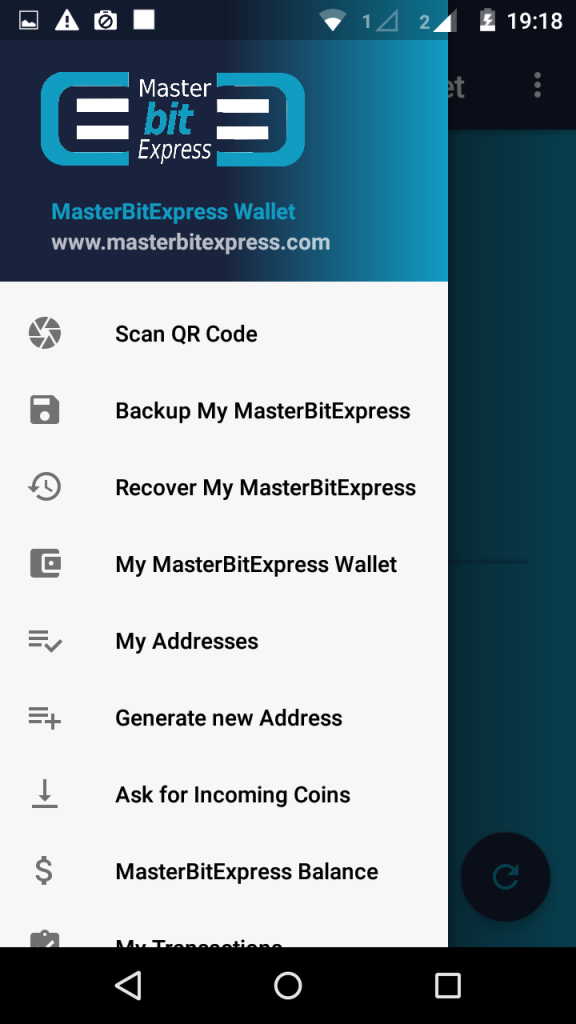
1) The Hamburger Icon leads to the lateral menu of the Wallet, from which the User access a rich set of functions:
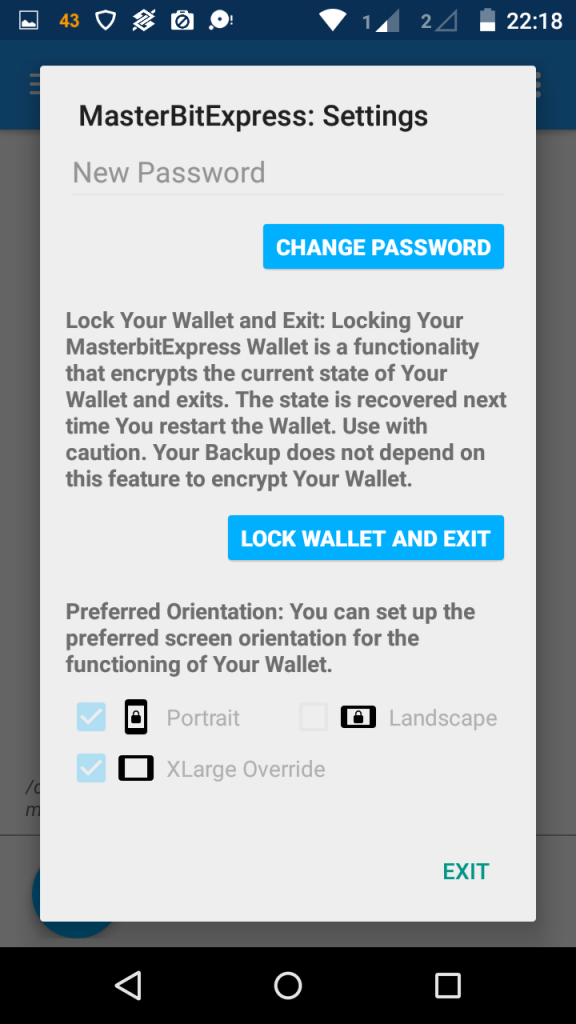
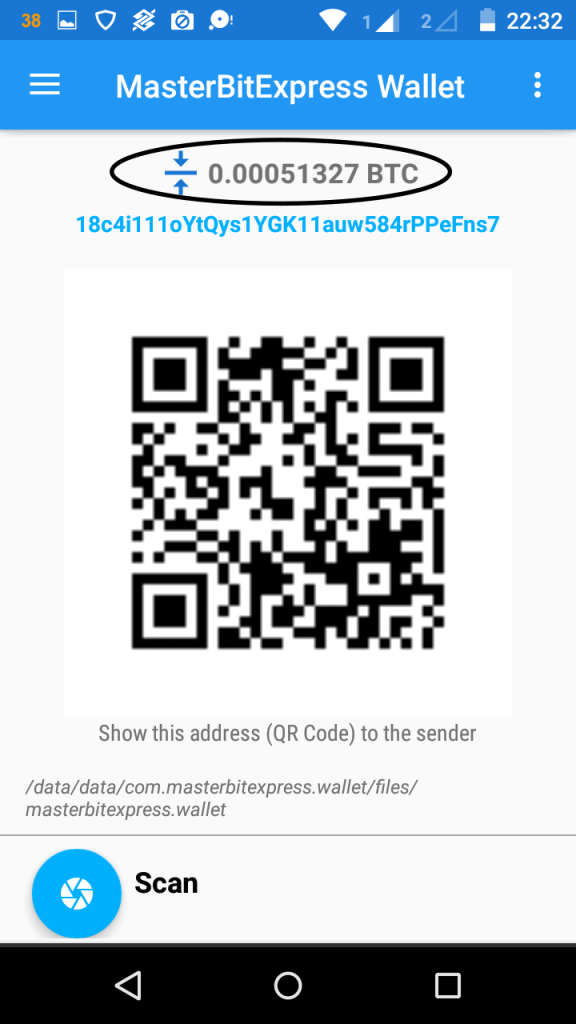
2) The Vertical Etcetera Icon allows the user access the Wallet Settings. The Wallet Settings area include important options to improve security, from which the user can even lock the wallet. 3) The Current User Balance informs his/her current contained balance of Bitcoins.
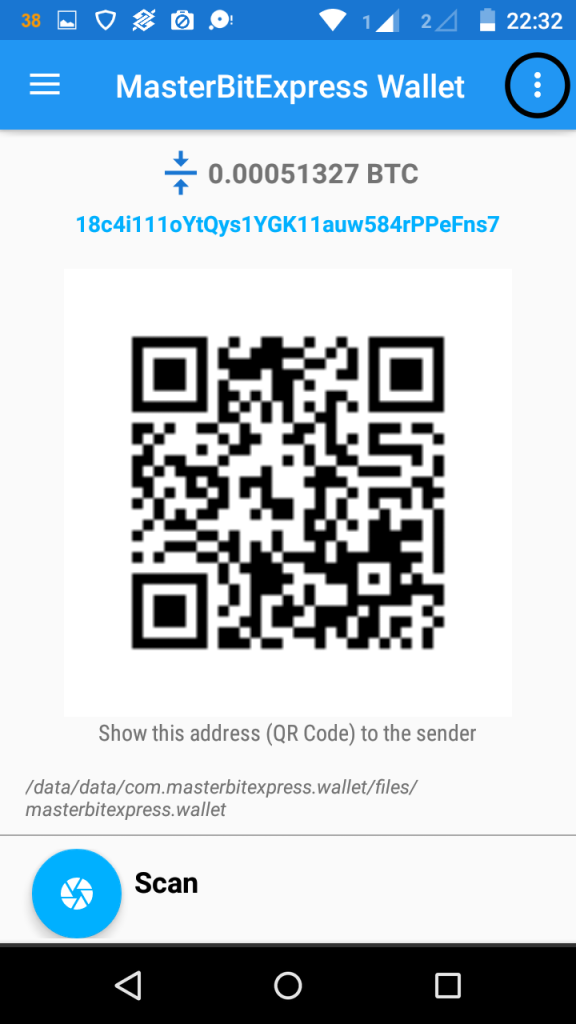
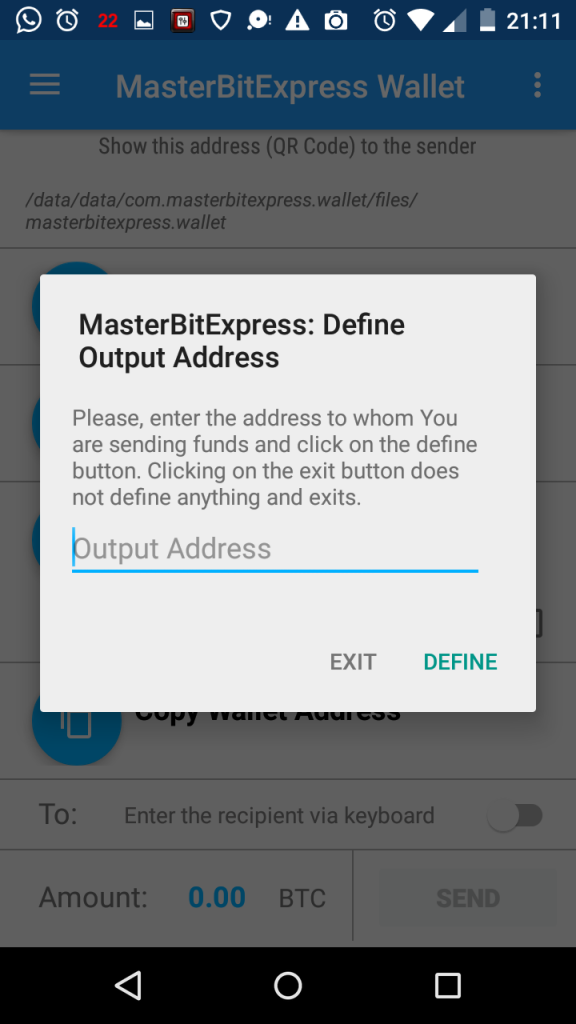
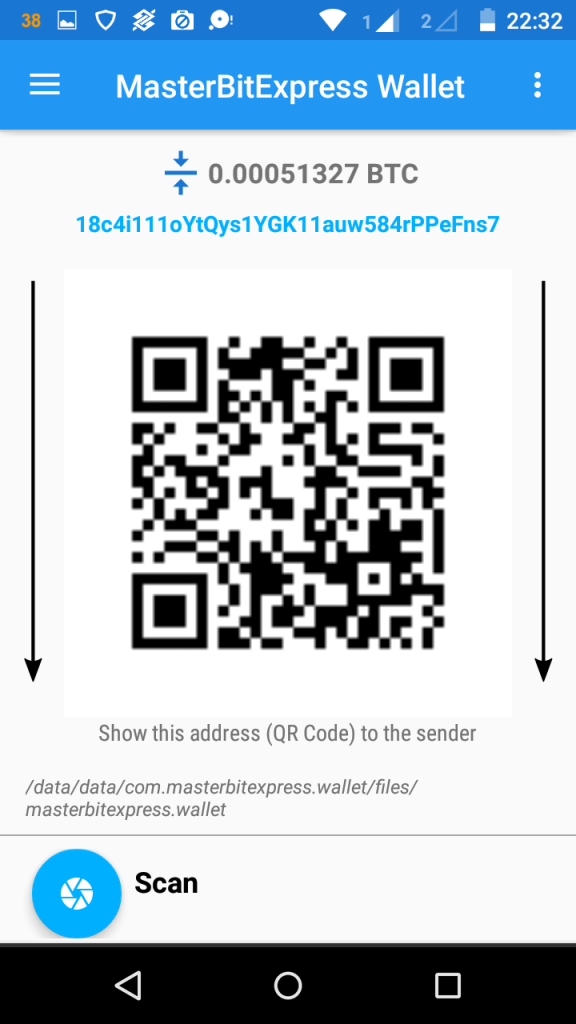
4) Beneath, the Currently Generated User Address for receiving BTCs, i.e., for receiving funds, a sequence of characters under convention that the User may inform to a payer for receiving Bitcoins (funds). 5) Equivalently, the same User’s Address for Receiving Funds under QR Code may be shown to a payer, so that the User’s address can be scanned by payer’s device camera. 6) The Scan Button is for Scanning an external address so that the User can send funds to from within his/her MasterBitExpress Wallet. The Scan Button feeds the Output Address Area, which is not shown, since the user needs to scroll up the screen to access this area (which we are going to explain soon).
Scrolling up the screen, the User accesses the remaining of the main MasterBitExpress Bitcoin Wallet area. This area has important regions we are going to explain further.
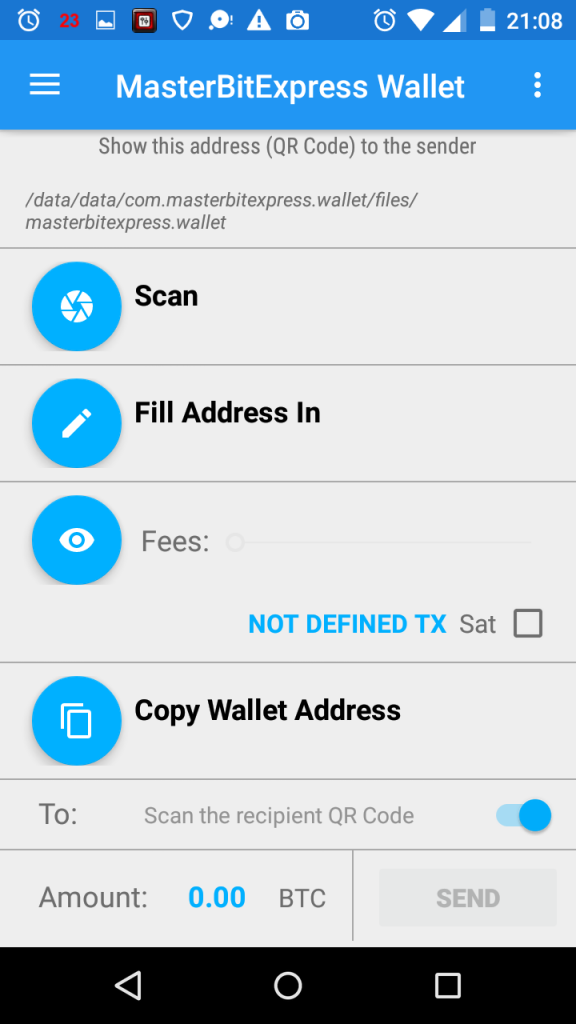
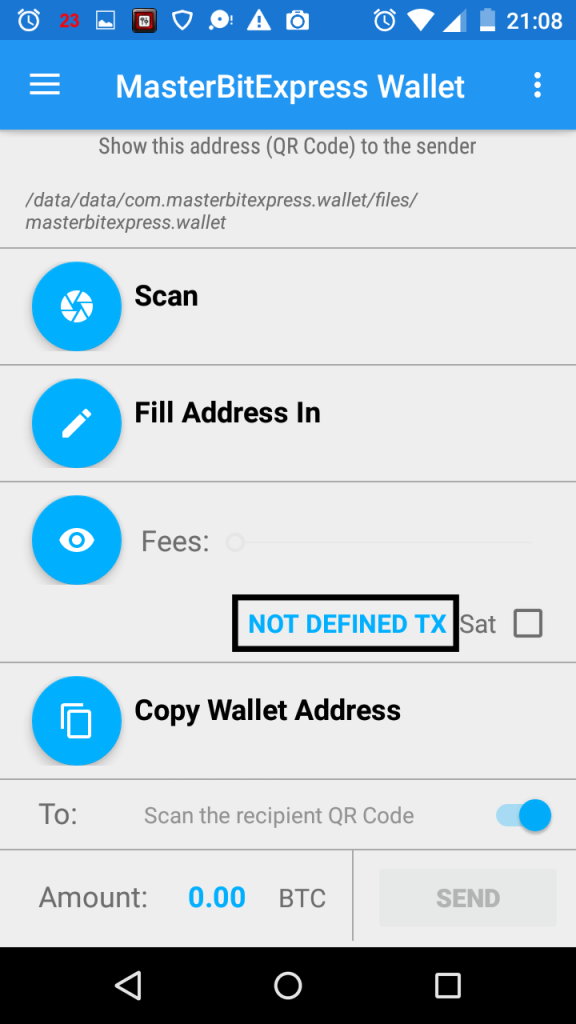
The latter screenshot shows 11 important areas of the main screen:
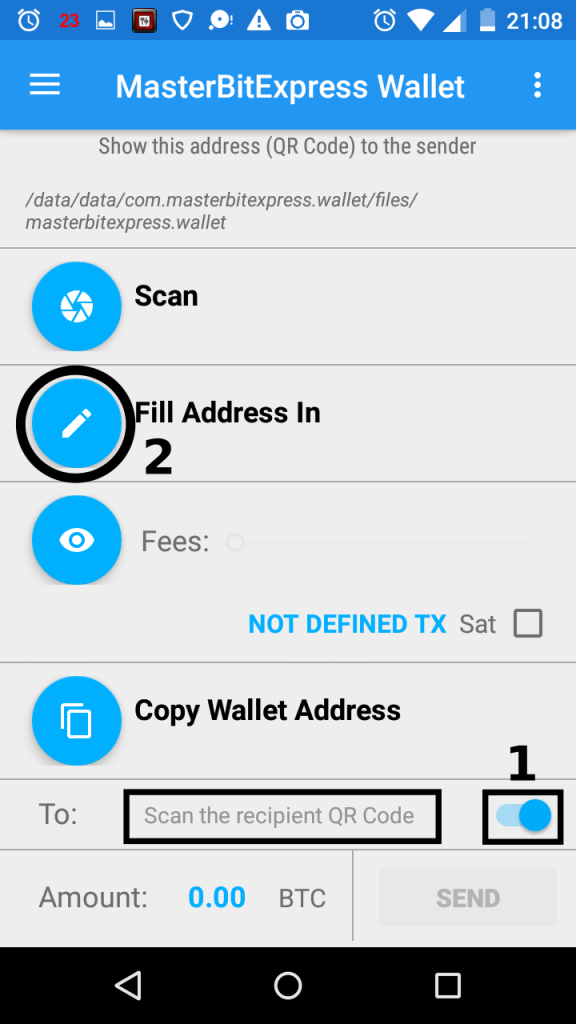
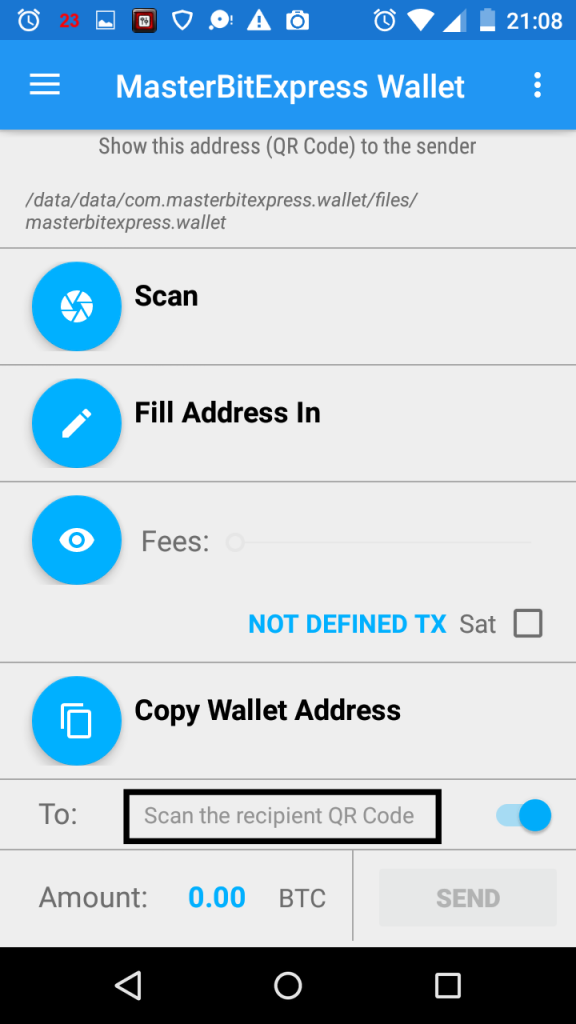
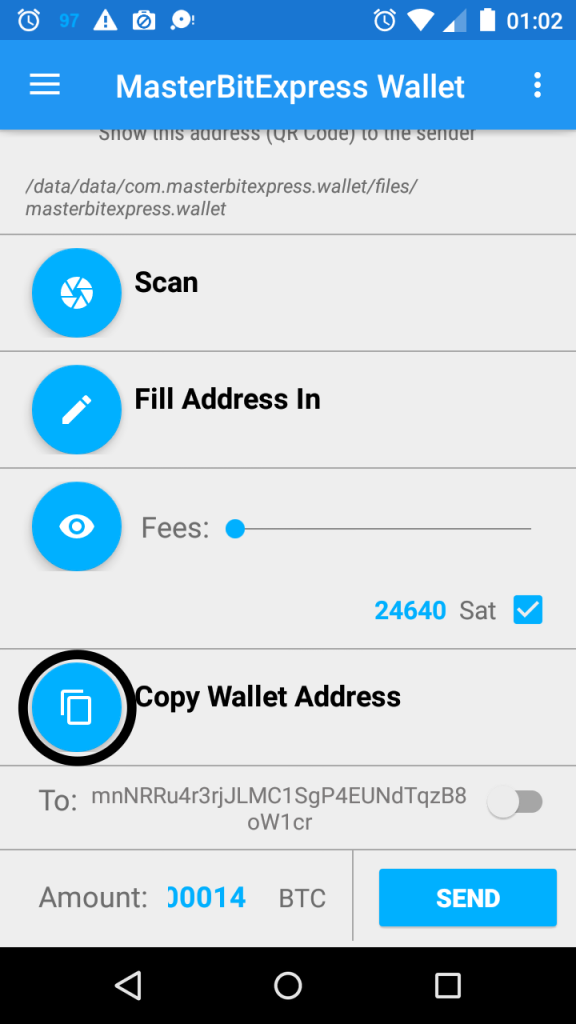
7) By using the Fill Address In Button, the User inserts via keyboard an address to whom he/she wants to send funds to. It is important to asseverate the user cannot fill in the recipient address via keyboard (2) unless the switch (1) have been set to its disabled position which is necessary for disabling the input via the device camera scanning.
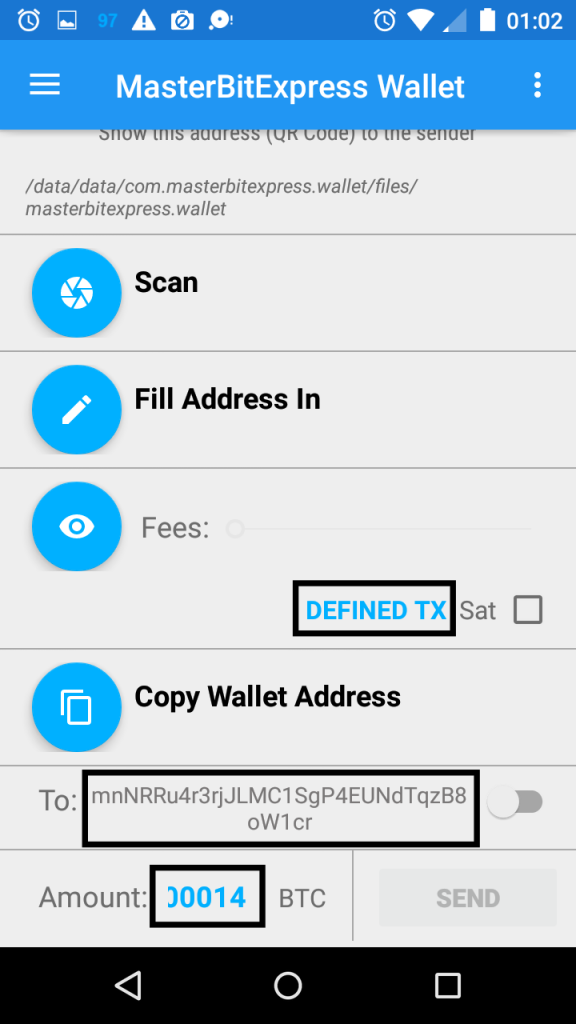
8) By using the Fees Button, the User infers the current state regarding the Fees Area. There exist three possible states for this area, which we are going to explain soon: NOT DEFINED TX, DEFINED TX, and DEFINED TX accepted by the user. Beneath, each corresponding information related to these states as per accessing them via the Fees Button.
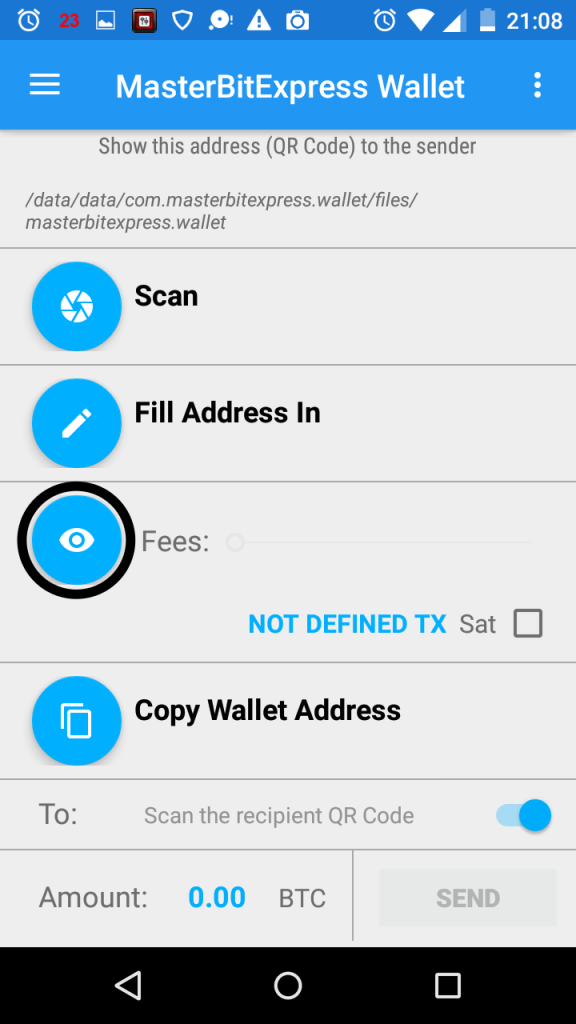

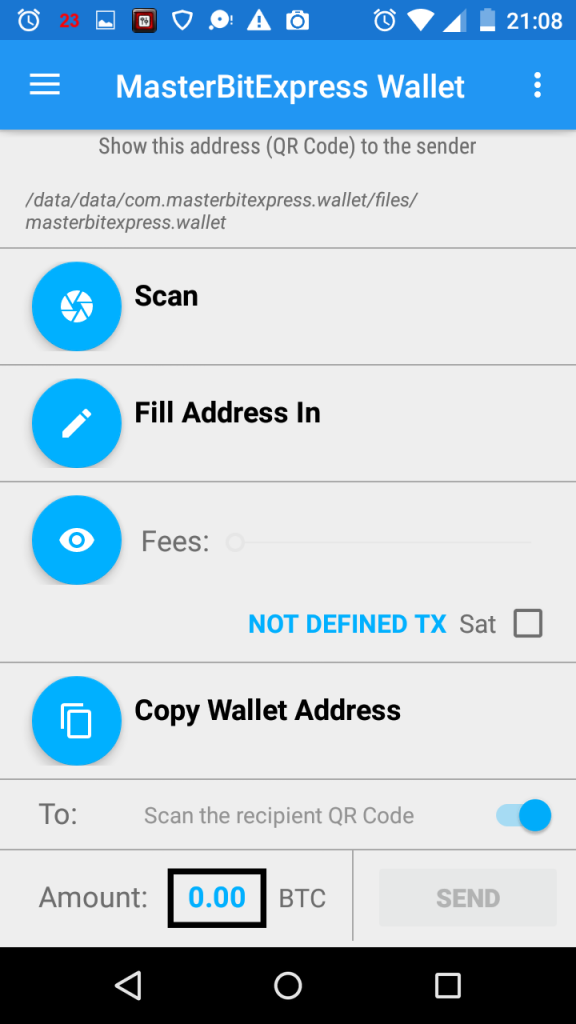
9) The TX Sending State Status Info is the area responsible for informing the User on the current transaction (TX) status regarding sending funds. The status changes from NOT DEFINED status to DEFINED status if and only if with both, the Sending Amount and the Recipient Address, defined. Hence, the User must define the value that is going to be sent by filling in the 10) Sending Amount Area as well as the address that is going to receive the funds by filling in the 11) Recipient Address Area.
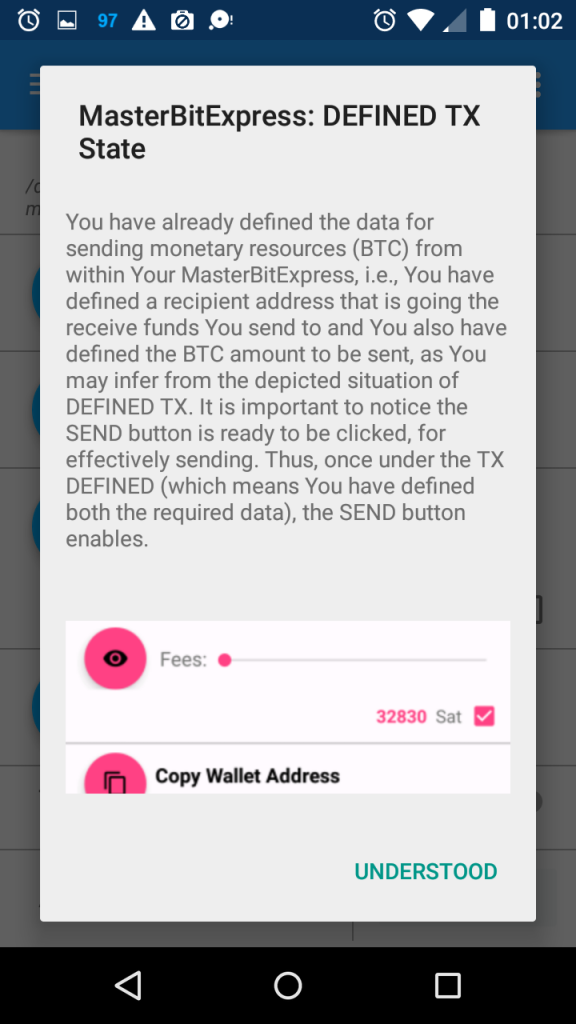
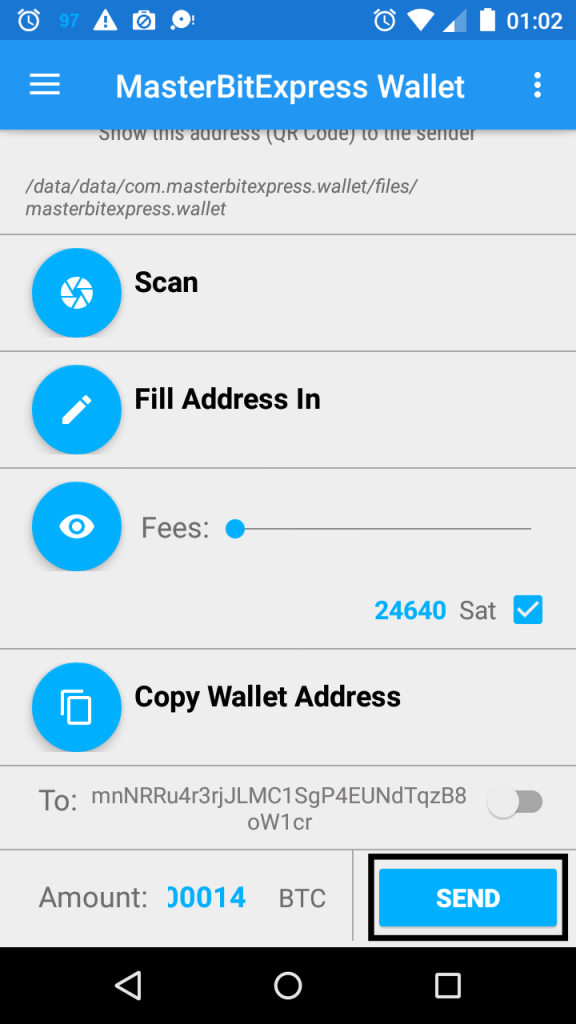
These latter required data for sending funds defined, the TX Sending State Status Info turns out to exhibit DEFINED TX status. Changing the TX Sending State Status Info to DEFINED TX is a necessary but not sufficient condition for sending funds. A required condition is the User checks, i.e., confirms, the TX by changing the 12) TX Confirmation Checkbox state from not checked to checked. Such confirmation, satisfied all the required conditions (as, e.g., the existence of sufficient funds), enables the 13) Send Button that, hence, must be clicked to send the defined funds (previously filled Sending Amount Area) to the defined recipient (previously filled Recipient Address Area).
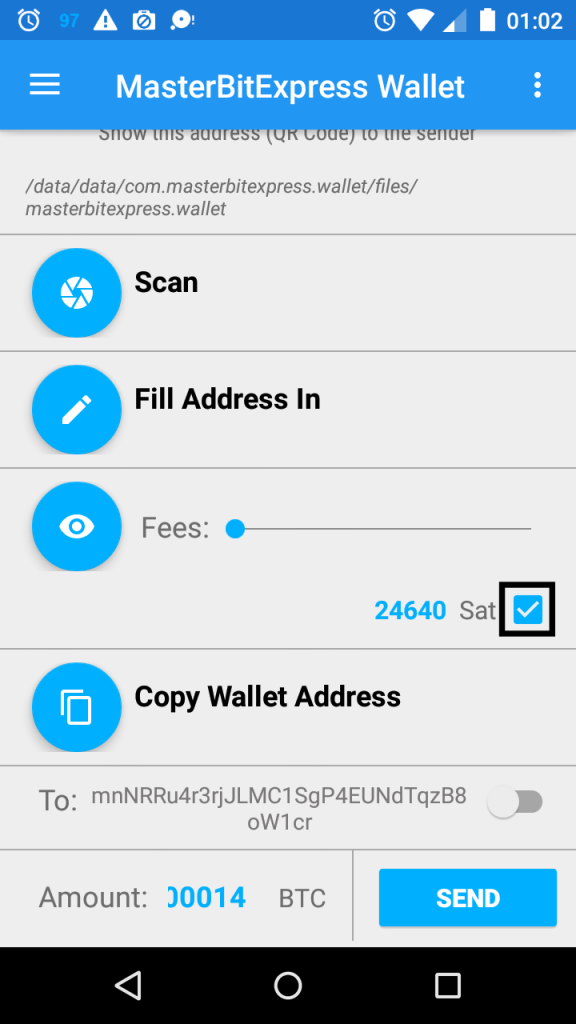
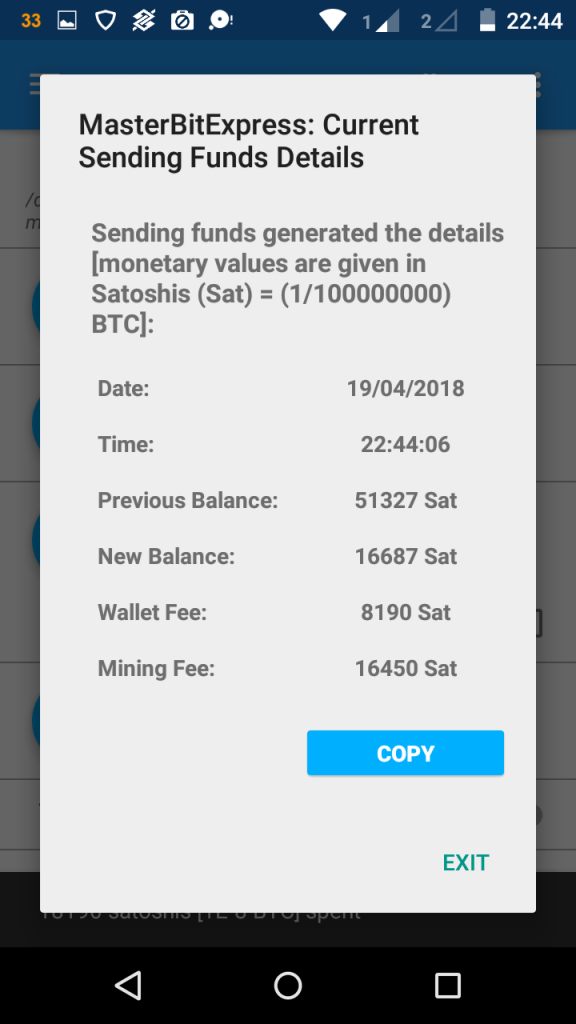
Another important functionality that turns out to be enabled by checking the TX Confirmation Checkbox is 14) the Fees Seek Bar. The corresponding current value that is slided from varying the Fees Seek Bar feeds the 15) Fees Value Amount Area. This latter area informs the current value chosen by the User to the total TX Fee, which is the sum of the Wallet Fee and the Mining Fee. At this stage, prior to send the current TX, the user can inspect the details for the currently defined TX by clicking on the Fees Button.
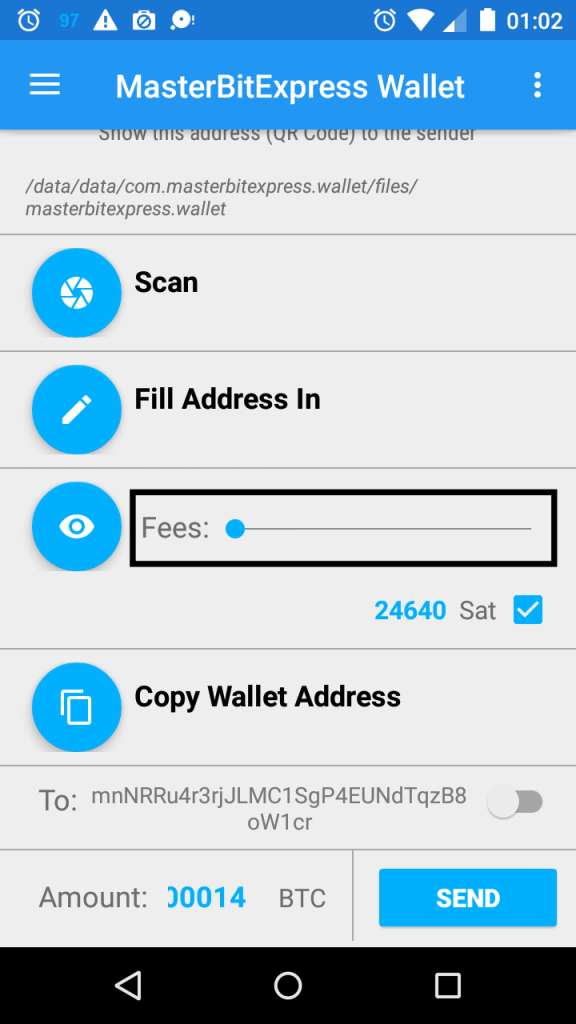
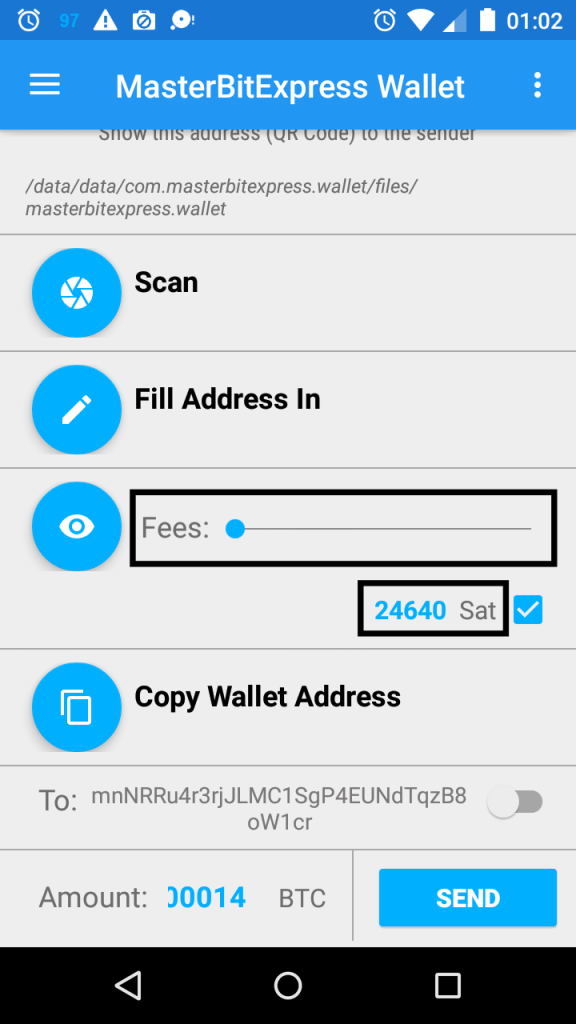
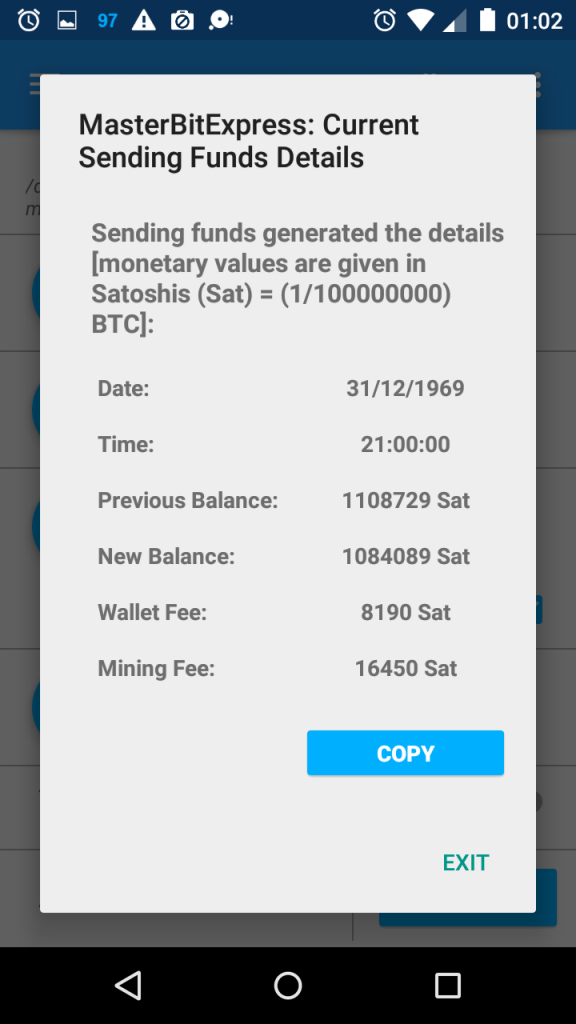
An important comment on the third of the latter three screenshots: this is just for information purposes on the related fees prior to send and by clicking on the Fees Button. Specifically, this TX was generated by defining a recipient address that pertains to the same wallet, so the sending funds returns to the wallet. This example is to illustrate the user should not send funds to himself/herself from and to the same wallet, expecting no fees being collected. The MasterBitExpress Bitcoin Wallet automatically rearranges wallet funds among its addresses so that such operation does not involve fees, which is to say the User does not need to rearrange funds by himself/herself among addresses pertaining to the same wallet.
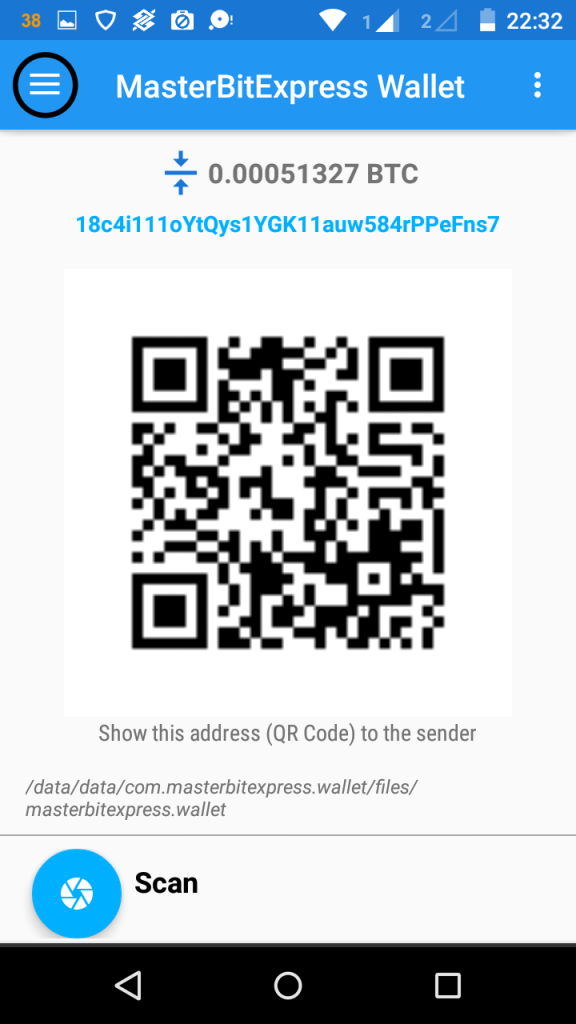
16) The Copy Wallet Address Button copies the Currently Generated User Address to the clipboard. 17) A New Currently Generated Address by Swiping may be promptly generated by swiping any of the lateral areas, either left or right, adjacent to the User’s Address for Receiving Funds under QR Code.
MasterBitExpress Bitcoin Wallet has a rich set of features. This article has shown the main interface.


Comments are closed.